Creating Your Gallery on the Bromley Art Society Website
Every member of the Bromley Art Society is allowed to create an on-line gallery of their works. The current allowance of space is 2Mb which allows for about 8 pictures. You will find this quite easy. These instructions look complicated only because they are detailed and contain some tips on how to do things.
If you prefer, you can download all the instructions as an Adobe PDF file.
If you have any problems don't be afraid to ask someone for help with your computer, particularly a member who has already got a gallery. If you are really stuck, ask the webmaster!
Adrian Fowle
Webmaster, Bromley Art Society
May 2008
Part 1 – Membership
- Only paid up members of the Bromley Art Society are allowed to create galleries. We reserve the right to remove galleries of those who leave the society.
-
You also need to be a registered user of the website, which is free. To create a new user account, click the button on the front page of the website.

- It may take a few days for me to recognise that new users of the site are members, and to make the necessary changes.
Part 2 – Take your photograph
- For small paintings and drawings you might find it easier to use a scanner. Nearly all scanners use the TIFF format by default, some will capture straight to JPEG format.
- If you are using a digital camera, consider the lighting (outdoors is easiest) and get the photo as straight as possible. There is advice on the society's forums and elsewhere.
- It is much easier to avoid reflections and glare if there is no glass in the way. Most professional sites do not show the frame.
- Most small digital cameras capture images in JPEG format. Larger cameras can usually do so.
Part 3 – Process your image
- Edit your image if necessary in your favourite image editing programme, using the following guidelines. Professionals use Adobe Photoshop. Many cameras and scanners come with a perfectly good version of this called Photoshop Elements or a similar programme. You can buy this sort of software for about £60 and older versions are sometimes much cheaper. You can even get free programs, such as Picasa from Google
- Important: every time you save a JPEG file it loses some quality, so always keep the original file and make your adjustments on a copy.
- First, crop and straighten your image. Many of these programs can correct images that are skewed.
- Adjust the light levels and colours – but remember that all computer monitors are slightly different and that what you see on screen may look different on other screens. This also applies to cameras and scanners. You can calibrate your own screen and camera at great expense, but people viewing your images are unlikely to have done this.
- The gallery will take most picture formats, but JPEG makes the best use of the space you have.
- Most colour inkjet printers print at 300 dots per inch (dpi) or more – so a 10 inch square picture has 3000 dots across and 3000 dots down. 9 million dots in total. This would make a huge file. Most standard computer screens are only 1024 pixels / dots across and 768 down. When you allow for the menu etc., there is little benefit from having a picture on-line that is bigger than about 800 by 600 – less than half a million dots in total.
- When you save a file in JPEG format you can choose the “quality” of the image. This is expressed either as “low” to “medium” to “high” or as a number from 3 to 15. This affects how much the file is compressed to save space and “low” or “medium” is usually good enough for on-line use.
- Reducing the pixels and the JPEG quality makes the image unattractive to print, so it is unlikely that your pictures will be stolen. If this still worries you, add a watermark using your image software at this stage, or using the gallery itself later. The society's website is not at present intended as a direct sales facility, just as a showcase for your work.
- Pictures of this size take up 40 – 400 Kb as a rough guide. You have an allowance of 2Mb, that is 2000Kb, of space so you should have room for about 8 pictures.
Part 4 – Create your gallery
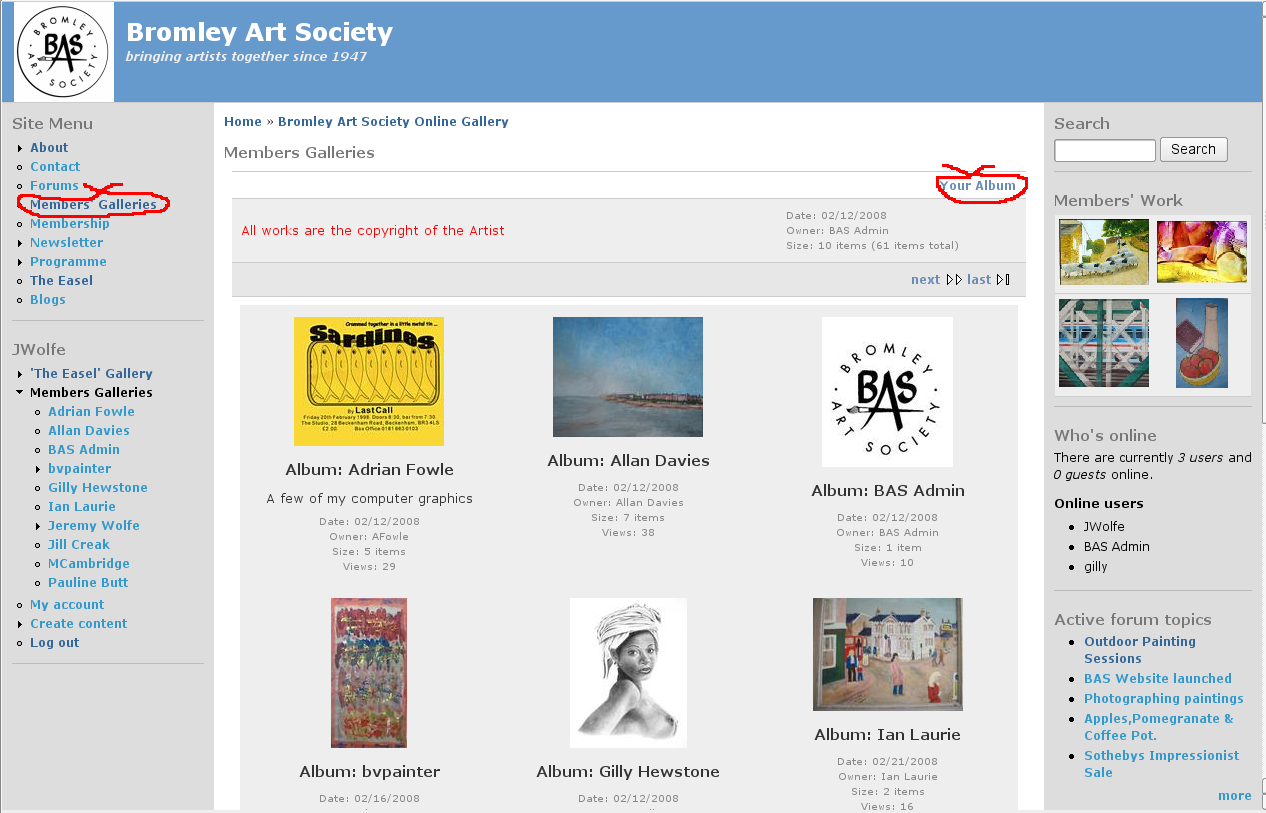
- Log in and from the society's homepage, click on “Members Galleries” in the menu on the left. The Gallery pages are now shown embedded within the central part of the web page. Click on “Your album” in the top right of the Gallery part.
- The gallery software was developed by photographers. They sometimes call things “photos” and sometimes “items”, “images” or “pictures”. Don't let that put you off.
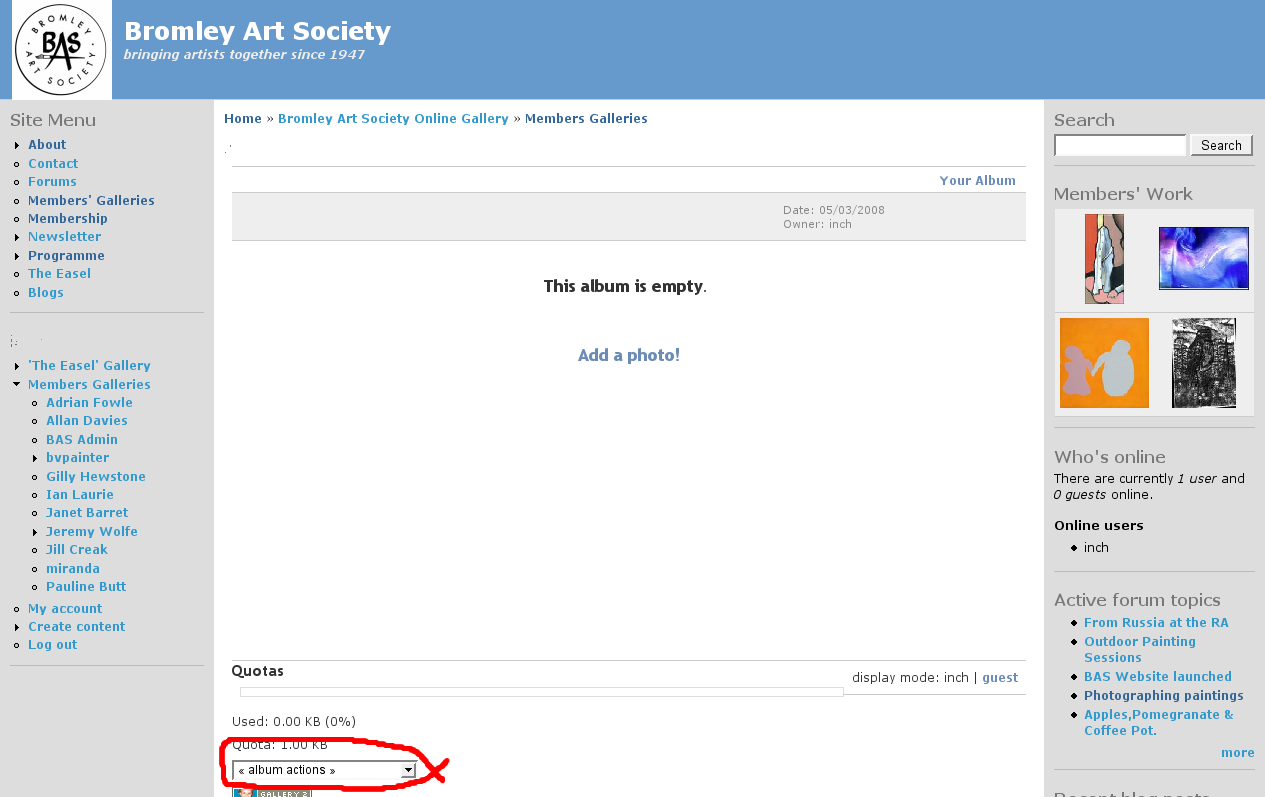
- Your gallery will be empty the first time you visit it. From the “album actions” drop down menu at the bottom of the gallery area, choose add items.
- There are several methods of adding items. These are shown in the tabs at the top of the gallery area. Choose the first one, “From Web Browser” by clicking on it. If you want to explore the other methods see the Gallery 2 website. Click on the “Browse” button – this sometimes appears as an icon showing a directory. You will then see a dialogue box for choosing your image. How this works depends on the type of computer you use, so it is not shown here. Find your file, select it and close the dialogue box. You will now see the file name in the web page. Underneath it you can add a caption if you wish, which by default will appear as both the summary and the description (see later section). You can add several pictures at once, if necessary click on the text “more upload boxes”. When you are ready, click the “Add Items” button at the bottom of the page and the upload will begin. It is quite slow, even with broadband.

- If you know how to make a ZIP file, you can put all your pictures in one file instead. Select this from the browser and the pictures will be uploaded and unzipped automatically, which is a little more convenient.
Part 5 – Final touches
- You have done the hard work, now you can have fun getting your gallery just how you want it.
- Have a look to see what other people have done with their galleries. It is a nice touch to tell people a little about yourself and your gallery as a whole, and about the individual paintings. BVPainter and Jeremy Wolfe are two examples. Don't be afraid to experiment and see how things look – you can always change them again.
- You are welcome at any time to delete your pictures and put different ones in their place.
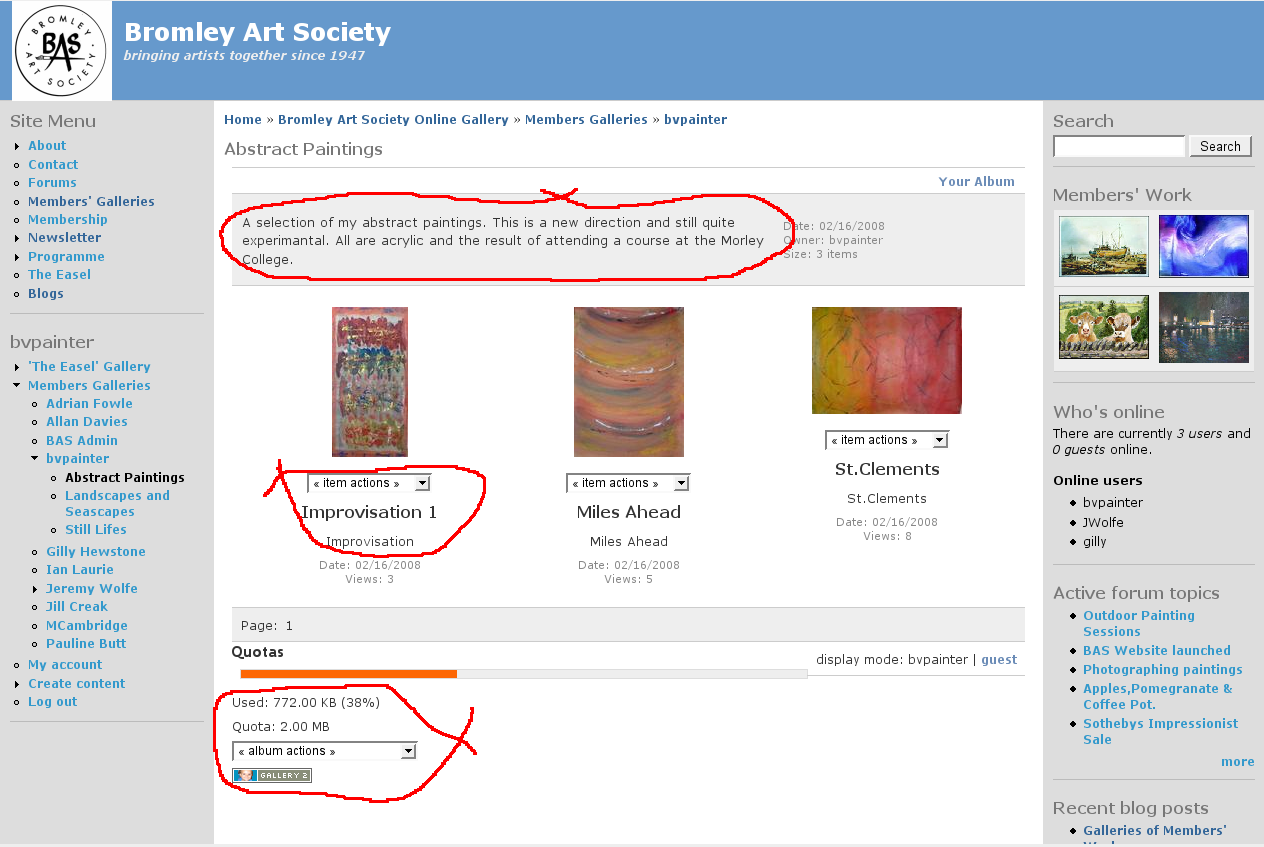
- Select your gallery to begin work on it. Your gallery consists of at least one album, but you can nest them one inside another like the directories or folders on your own computer. Each album can contain pictures. At the bottom of the gallery section is a drop down menu of “album actions” for the current album. You will also see your quota of file space and how much you have already used. Underneath each sub-album or picture is a drop down menu of “album actions” or “item actions”, which affect only that album or picture, and a summary of the picture. At the top of the screen shot you can see a few lines of text which is the description of the album.
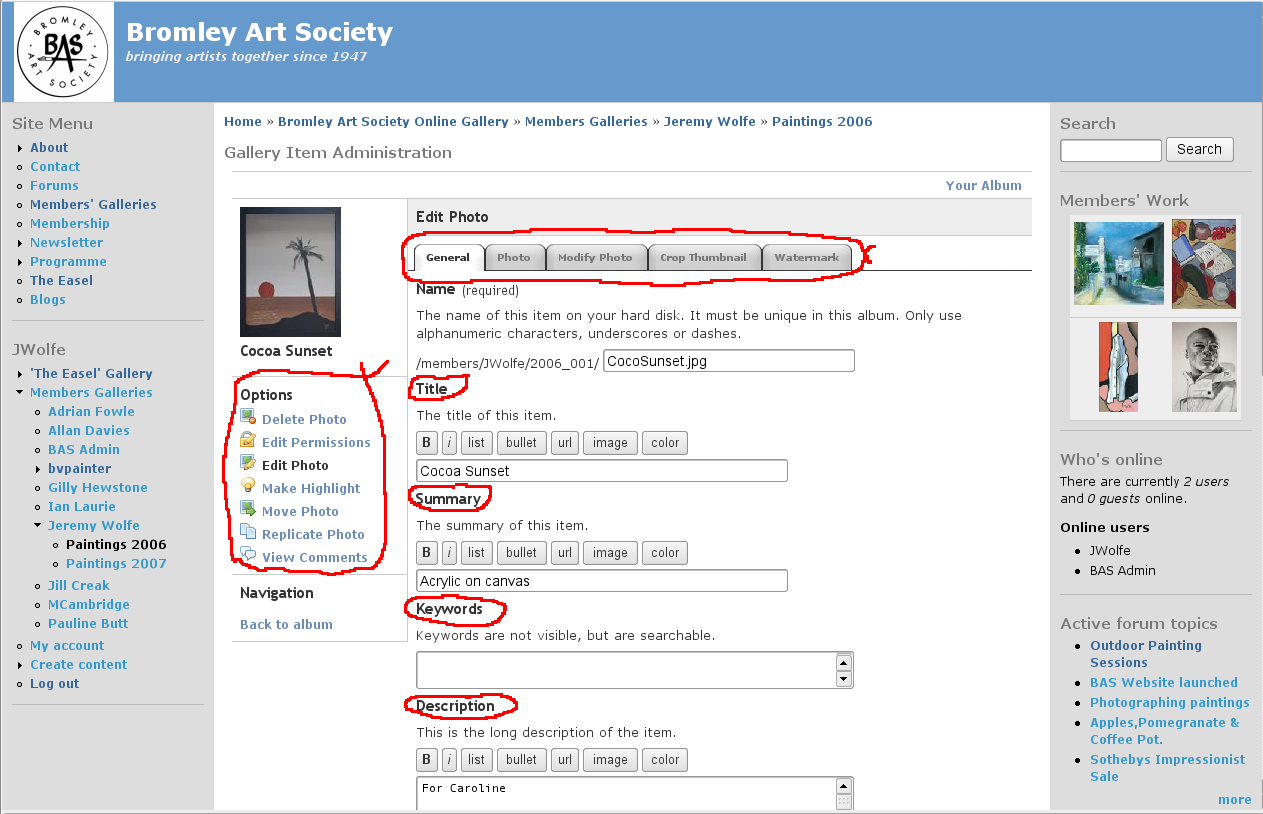
- When you edit an item, i.e. picture, you will see something like the following screen shot There is something similar for albums, with a few extra options. There is a main menu on the left – most of the time you will only want the “Edit Photo” option. When this is selected, explore the items on the menu tabs across the top. On the first one “General” you can select the Title, Summary and Description of the item.
- The “Make Highlight” menu option makes the current picture the icon for the album as a whole. On the album menu you can choose instead to have a random highlight / icon. On the whole it is best not to make other radical changes without discussion with the webmaster!